
Hello, my dears! Clara here, back in my cozy kitchen, ready to share a recipe that will transport you straight back to the warmth of Grandma’s kitchen. Today, we’re making Ooey-Gooey Cheesy Garlic Chicken Wraps – a dish that combines the comforting flavors of garlic, cheese, and chicken in a delightfully simple package. These wraps are not only incredibly delicious but also wonderfully easy to make, perfect for a quick weeknight dinner. I believe that even the busiest of bees can whip up a batch of these and bring a little sunshine to their table. These cheesy garlic chicken wraps are a family favorite, and I just know they will be in your home, too.
I remember when my own grandchildren would come over, their eyes would light up the moment they smelled the garlic wafting from the kitchen. It’s a recipe filled with love and simple pleasures, and I’m absolutely thrilled to share it with you.
Why You’ll Love This Recipe
Oh, where do I even begin? This recipe isn’t just about the ingredients; it’s about the memories you’ll create. But let me give you a few reasons why you’ll fall head over heels for these wraps:
- Quick and Easy: For busy weeknights, this recipe is a lifesaver. It comes together in under 30 minutes!
- Kid-Friendly: What’s not to love about cheese, chicken, and a soft tortilla? Even the pickiest eaters will gobble these up.
- Customizable: Feel free to add your favorite veggies, spices, or sauces to make it your own.
- Comfort Food: It’s the perfect blend of savory, cheesy, and comforting – a taste of childhood in every bite.
- Versatile: Serve them as a main course, appetizer, or even a snack.
Ingredients: The Heart of the Matter
Let’s gather our ingredients. Remember, quality ingredients make all the difference. Don’t skimp on the cheese! Here’s what you’ll need:
- Chicken: You’ll need about 1 pound of cooked chicken, diced into small, bite-sized pieces. You can use leftover rotisserie chicken, grilled chicken, or even canned chicken for a super-quick option.
- Salt and Pepper: To taste. A good pinch of each will do.
- Olive Oil: About 1 tablespoon, for sautéing the garlic.
- Minced Garlic: 2-3 cloves, depending on your love for garlic. Freshly minced is always best!
- Cheese: A blend of your favorites! I usually go for 1 cup of shredded cheddar cheese and 1/2 cup of shredded mozzarella cheese.
- Tortillas: 6-8 large tortillas, preferably the soft, flour kind.
- Butter: 2 tablespoons, for browning the wraps to golden perfection.
- Chopped Parsley: For garnish, optional but adds a lovely freshness.
These are the key components to creating the best cheesy garlic chicken wraps. With these ingredients, you can create a delicious meal. If you want to add more, feel free to add your own touches.
Step-by-Step: Crafting the Perfect Wrap
Now, let’s get to the fun part! Follow these simple steps, and you’ll have a batch of Ooey-Gooey Cheesy Garlic Chicken Wraps in no time:
- Prepare the Chicken: If you have not already, start by cooking the chicken. Season it lightly with salt and pepper and either bake, sauté, or grill until done. Dice into small bite-sized pieces and set aside. The chicken is the foundation of our delicious filling.
- Sauté the Garlic: In a pan over medium heat, warm the olive oil. Add the minced garlic and sauté just until golden and fragrant, around thirty seconds to one minute. Be careful not to burn it, or it will become bitter.
- Combine Chicken and Garlic: Add the diced chicken to the pan and toss it with the garlic oil to infuse flavor evenly. This is where the magic begins!
- Melt the Cheese: Remove from heat and stir in both cheeses while the chicken is still hot. This helps the cheese start melting before it goes into the wrap.
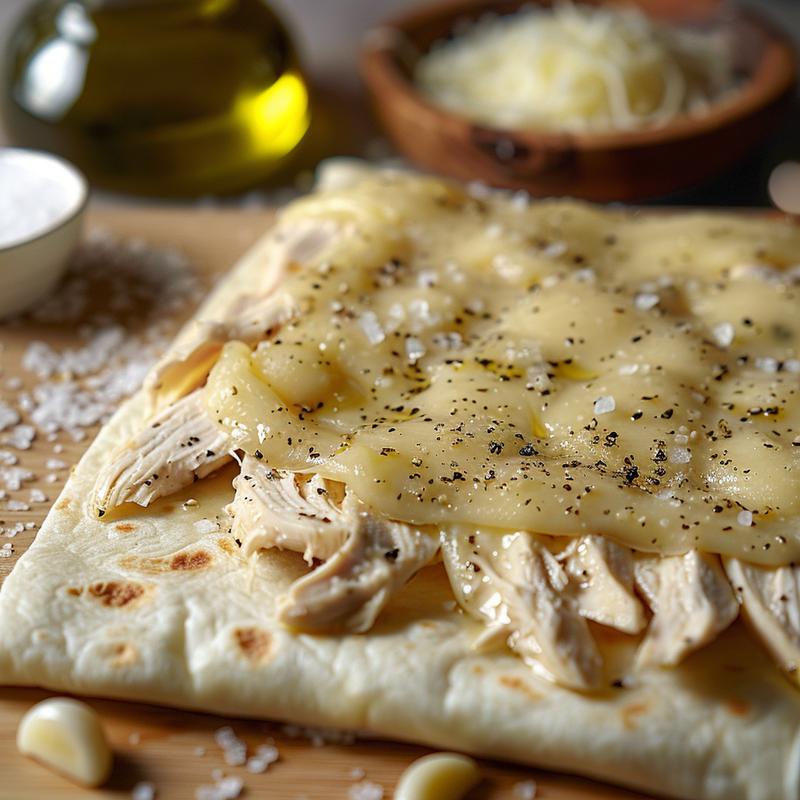
- Assemble the Wraps: Lay a tortilla flat and spoon a generous portion of the cheesy garlic chicken mixture into the center. Fold in the sides and roll it tightly like a burrito.
- Brown to Perfection: In a skillet, melt the butter over medium heat. Place the wraps seam-side down and press gently. Cook each side for two to three minutes or until golden brown and crispy. Flip carefully to avoid spilling any filling.
- Rest and Slice: Once all wraps are cooked, remove from the skillet and let them rest for one to two minutes before slicing. This allows the cheese to settle and prevents it from oozing out everywhere when you cut them.
- Garnish and Serve: Sprinkle chopped parsley over the top if desired, and serve warm.
And there you have it! A simple, yet satisfying recipe that will bring a smile to everyone’s face.
Pro Tips for Cheesy Garlic Chicken Wrap Perfection
Here are a few tips to ensure your Cheesy Garlic Chicken Wraps are absolutely perfect. Remember, baking (and cooking!) is a science, but it’s also an art!
- Don’t Overcook the Garlic: Burnt garlic is bitter and can ruin the entire dish. Keep a close eye on it and remove it from the heat as soon as it turns golden.
- Warm the Tortillas: This makes them more pliable and less likely to tear when you’re rolling them. You can warm them in the microwave for a few seconds or on a dry skillet.
- Use a Good Quality Cheese: The better the cheese, the better the flavor. I recommend using freshly grated cheese rather than pre-shredded, as it melts more smoothly.
- Don’t Overfill the Wraps: Too much filling will make them difficult to roll and can cause them to burst open while cooking.
- Press Gently: When browning the wraps in the skillet, press them gently with a spatula to ensure even cooking and a crispy exterior.
These pro tips will help you elevate your Cheesy Garlic Chicken Wraps to the next level.
Common Mistakes to Avoid
Even the most seasoned cooks make mistakes. Here are a few common pitfalls to watch out for:
- Using Cold Chicken: Cold chicken will cool down the cheese too quickly, preventing it from melting properly. Make sure your chicken is warm before adding the cheese.
- Overheating the Skillet: A skillet that’s too hot will burn the wraps before the cheese has a chance to melt. Keep the heat at medium and adjust as needed.
- Not Sealing the Wraps Properly: If the wraps aren’t sealed tightly, the filling will spill out while cooking. Make sure to fold in the sides and roll them snugly.
- Ignoring the Resting Time: Letting the wraps rest for a minute or two before slicing allows the cheese to set and prevents it from making a mess.
Variations: Spice It Up!
Want to add a little twist to your Cheesy Garlic Chicken Wraps? Here are a few fun variations:
- Spicy Wraps: Add a pinch of red pepper flakes to the garlic oil for a little heat.
- Veggie-Loaded Wraps: Mix in some diced bell peppers, onions, or spinach for added nutrition.
- BBQ Chicken Wraps: Use BBQ sauce instead of olive oil and add a drizzle of BBQ sauce to the filling.
- Creamy Tomato Garlic Chicken Wraps: Add a dollop of cream cheese to the filling for extra creaminess and tang. A creamy tomato garlic pasta is the perfect side for this.
- Italian Wraps: Add some Italian seasoning and sun-dried tomatoes to the filling for an Italian-inspired flavor.
These variations are just a starting point – feel free to get creative and experiment with your favorite flavors!
Storage Instructions: Keeping Them Fresh
If you happen to have any leftovers (though I doubt you will!), here’s how to store them:
- Refrigerate: Store cooked wraps in an airtight container in the refrigerator for up to 3 days.
- Reheat: Reheat in a skillet over medium heat or in the microwave until warmed through.
Frequently Asked Questions (FAQ)
Let’s tackle some common questions:
- Can I use pre-cooked chicken? Absolutely! Rotisserie chicken or leftover grilled chicken works great.
- Can I freeze these wraps? I don’t recommend freezing them as the tortillas can become soggy.
- Can I make these ahead of time? Yes, you can assemble the wraps ahead of time and store them in the refrigerator until you’re ready to cook them.
- What kind of cheese is best? Cheddar and mozzarella are classic choices, but feel free to use any cheese that melts well, such as Monterey Jack or provolone.
Serving Suggestions: A Complete Meal
These Cheesy Garlic Chicken Wraps are delicious on their own, but here are a few ideas to make it a complete meal:
- Side Salad: A simple green salad with a light vinaigrette complements the richness of the wraps.
- Tomato Soup: A warm bowl of tomato soup is a classic pairing.
- Sweet Potato Fries: For a heartier meal, serve with sweet potato fries.
- Coleslaw: The tangy coleslaw cuts through the richness of the cheesy garlic chicken.
And there you have it, my dears! A truly delightful and easy recipe for Ooey-Gooey Cheesy Garlic Chicken Wraps. I hope this brings as much joy to your kitchen as it has to mine. Remember, cooking is about love, patience, and a little bit of magic. Until next time, happy baking!
These wraps are great for busy weeknights. For busy parents, it’s important to have fast dinner recipes, and these cheesy garlic chicken wraps are a perfect fit. If you are looking for a quick and easy meal to make, these are a great option. You can also check out my recipes for Creamy Garlic Cheesy Chicken Potatoes and Healthy Garlic Parmesan Chicken Pasta!
I know that sometimes it’s hard to find the time to cook, but it’s important to make sure you re getting enough nutrients in your diet. That’s why I love to share healthy pastas and easy pasta recipes that are both delicious and nutritious. It’s important that the chicken is properly cooked before adding it to the wraps. The chicken should be seasoned with salt and pepper to make sure it is flavorful. To make the creamy tomato garlic pasta, you’ll need ripe tomatoes, heavy cream, olive oil, and garlic. The pasta is then tossed in a luscious sauce that combines all of these ingredients. This delicious pasta is a great addition to any meal! According to my family, this garlic pasta is one of their favorites!

Ooey-Gooey Cheesy Garlic Chicken Wraps
Ingredients
Method
- Cook chicken, season with salt and pepper, and dice.
- Sauté garlic in olive oil until fragrant. Add chicken and toss.
- Remove from heat and stir in cheese until melted.
- Lay tortilla flat, spoon in chicken mixture, fold sides, and roll tightly.
- Melt butter in skillet, cook wraps seam-side down until golden brown and crispy.
- Let wraps rest for 1-2 minutes before slicing.
- Sprinkle with parsley and serve warm.
Notes
Loved this recipe? Save it to your favorite Pinterest board so you can easily find it later! ✨
