Welcome to the World of Homemade Banana Bread
There’s something truly magical about the smell of banana bread baking in the oven. It evokes memories of cozy kitchens, family gatherings, and the sweet taste of nostalgia. In this comprehensive guide, we will explore the art of creating the perfect gluten-free banana bread, a delightful treat that captures the essence of childhood comfort. With ripe bananas, wholesome ingredients, and a touch of love, this recipe not only promotes a healthier lifestyle but also promises to be a crowd-pleaser in any household.
This article will guide you through each step of the process, offering invaluable tips, troubleshooting advice, and delightful variations to suit your taste. Whether you’re gluten-sensitive or simply seeking a delicious banana bread recipe, you’re in the right place. Let’s embark on this baking journey together, where every loaf is a piece of home.
Why You’ll Love This Recipe
- Wholesome Ingredients: Made with simple, nutritious components like ripe bananas and gluten-free flour, this recipe promotes a healthier approach to baking.
- Gluten-Free Delight: Perfect for those with gluten sensitivities, this banana bread recipe doesn’t compromise on taste or texture.
- Easy to Make: With just a few steps and no fancy equipment required, baking banana bread becomes a delightful ritual, not a chore.
- Customizable: This recipe allows for numerous substitutions and additions, making it easy to create your perfect loaf.
- Memory-Infused Flavor: Each bite brings a taste of childhood comfort, making it the perfect treat for any time of the day.
Ingredient Breakdown and Substitutions
Understanding the role of each ingredient is crucial for achieving the best results in your baking endeavors. Here’s a detailed breakdown of what we’ll be using in our gluten-free banana bread and some substitutions you might consider.
- Ripe Bananas: The star of the show! Look for bananas that are well-ripened with plenty of brown spots. If you’re in a pinch, you can use frozen bananas—just thaw and drain excess liquid.
- Eggs: These are essential for binding and providing moisture. If you’re looking for a vegan alternative, you can substitute each egg with a “flax egg” (1 tablespoon ground flaxseed mixed with 2.5 tablespoons water, let sit until gelatinous).
- Honey or Maple Syrup: Both serve as natural sweeteners. For a sugar-free option, consider using a sugar substitute that measures cup-for-cup.
- Coconut Oil: This adds moisture and a subtle flavor. You can replace it with unsalted butter or any neutral oil like canola or avocado oil.
- Gluten-Free Flour Blend: A good quality blend is key for a perfect texture. You can use a store-bought gluten-free flour mix or make your own with a mixture of rice flour, tapioca flour, and potato starch.
- Baking Soda: This is the leavening agent that helps your bread rise. Ensure it’s fresh for the best results.
- Salt: Enhances the overall flavor. Don’t skip this step!
- Ground Cinnamon: For that cozy, warm flavor. Feel free to add nutmeg or vanilla extract for extra depth.
- Walnuts or Chocolate Chips (Optional): These add texture and flavor. Choose based on your preference or leave them out for a plain loaf.
Pro Tips for Perfect Banana Bread
As with any baking venture, a few expert insights can make all the difference. Here are some tried-and-true tips to elevate your banana bread game:
- Don’t Overmix: When combining your wet and dry ingredients, stir until just combined to avoid a dense loaf.
- Check for Ripeness: The riper the bananas, the sweeter and more flavorful your bread will be.
- Use Room Temperature Ingredients: This helps the batter come together more smoothly. If you’ve just pulled your eggs or coconut oil from the fridge, let them sit out for a bit.
- Test for Doneness: Insert a toothpick into the center of the bread—if it comes out clean, your banana bread is ready to be enjoyed.
- Let it Cool: Patience is key! Allow your banana bread to cool in the pan for about 10 minutes before transferring it to a wire rack.
- Wrap it Up: Store your banana bread properly by wrapping it in plastic wrap or aluminum foil. This helps retain moisture and keep it fresh longer.
- Experiment with Add-Ins: Try adding dried fruit, shredded coconut, or spices to customize your loaf.
- Don’t Fear the Freezer: If you have leftover bread, slice it and freeze it! You can toast it straight from the freezer for a quick treat.
Common Mistakes and Troubleshooting
Baking can be a delicate dance, and sometimes, things don’t go as planned. Here are common pitfalls and how to avoid them:
- Dense Texture: This usually results from overmixing or not using enough leavening agent. Be gentle and ensure your baking soda is fresh.
- Dry Bread: Overbaking is often the culprit. Keep an eye on your bread as it nears the end of the baking time.
- Unpleasant Flavor: Using overly ripe bananas can lend an off taste. Stick to bananas that are just past their peak.
- Burnt Edges: If your bread is browning too quickly, cover it loosely with aluminum foil until the center is fully cooked.
- Too Much Sweetness: Adjust the amount of honey or syrup to fit your taste. You can always add more, but you can’t take it out!
Delicious Variations of Banana Bread
Now that you have the foundational recipe down, why not try some fun variations? Here are four delightful twists on the classic:
- Chocolate Chip Banana Bread: Fold in ½ cup of dark chocolate chips into the batter for a sweet surprise.
- Nutty Banana Bread: Add ½ cup of chopped walnuts or pecans for a crunchy texture.
- Coconut Banana Bread: Incorporate ½ cup of shredded coconut for a tropical twist.
- Spiced Banana Bread: Add 1 teaspoon of nutmeg and a pinch of cloves for a warm, spiced flavor.
Storage and Make-Ahead Instructions
Proper storage can extend the life of your banana bread, allowing you to enjoy it longer. Here’s how to store and make ahead:
- Room Temperature: Store your banana bread at room temperature in an airtight container for up to 3 days.
- Refrigerator: If you prefer, you can refrigerate it for up to a week, though this may dry it out slightly.
- Freezing: Wrap slices in plastic wrap and place them in a freezer-safe bag. They can last for up to 3 months. Thaw at room temperature or toast from frozen!
- Make-Ahead Option: You can prepare the batter and store it in the fridge for up to 24 hours before baking. Just give it a gentle stir before pouring it into the pan.
Frequently Asked Questions (FAQ)
1. Can I use frozen bananas? Yes! Just make sure to thaw and drain any excess liquid before mashing.
2. What is the best gluten-free flour blend to use? Look for a blend that includes a mix of rice flour, tapioca flour, and potato starch for the best results.
3. Can I make this banana bread vegan? Absolutely! Use flax eggs instead of regular eggs and a liquid sweetener like maple syrup.
4. How do I know when my banana bread is done? Insert a toothpick into the center; if it comes out clean, it’s ready!
5. What can I do if my banana bread is too sweet? You can reduce the amount of honey or syrup in the recipe. Taste the batter before baking!
6. Can I add other fruits to the banana bread? Yes! Blueberries, chopped apples, or even shredded zucchini can be great additions.
7. How long does banana bread last? When stored properly, it can last up to a week at room temperature or up to three months in the freezer.
8. Is this banana bread suitable for kids? Yes! It’s a healthy treat that kids will love, especially with chocolate chips or nuts.
Nutrition Tips and Dietary Adaptations
This gluten-free banana bread can easily be adapted to suit various dietary needs. Here are some tips to consider:
- Low Sugar: Substitute honey or maple syrup with a sugar alternative like erythritol or monk fruit sweetener.
- Nut-Free: Omit nuts and choose a nut-free flour blend. You can also add seeds like sunflower or pumpkin for crunch.
- High Protein: Add a scoop of protein powder to the dry ingredients for an extra boost.
- Low Carb: Use almond flour or coconut flour in place of gluten-free blends for a lower-carb option.
Essential Equipment for Baking Banana Bread
Having the right tools can make your baking experience smoother and more enjoyable. Here’s what you’ll need:
- 9×5 Inch Loaf Pan: A classic pan that gives your bread the perfect shape.
- Mixing Bowls: A large bowl for mixing wet ingredients and a separate one for dry ingredients.
- Measuring Cups and Spoons: Accurate measurements are crucial for baking success.
- Whisk and Spatula: A whisk for combining dry ingredients and a spatula for folding in the batter.
- Cooling Rack: Allows your banana bread to cool evenly and prevents sogginess.
Serving Suggestions
Banana bread is delightful on its own, but here are some serving suggestions to elevate your experience:
- Warm with Butter: Spread a pat of butter on a warm slice for a comforting treat.
- Top with Nut Butter: Almond or peanut butter adds a protein punch and complements the sweetness.
- Pair with Yogurt: Serve alongside a dollop of Greek yogurt for a nutritious breakfast.
- Add Fresh Fruit: Slices of banana, berries, or a sprinkle of cinnamon can enhance the flavor.
Conclusion
Creating the perfect gluten-free banana bread is a rewarding experience that combines simplicity with deliciousness. With the right ingredients, techniques, and a sprinkle of love, you can craft a loaf that not only satisfies your taste buds but also brings back cherished memories of home. So, gather your ingredients, preheat your oven, and let’s fill your kitchen with the warmth of freshly baked banana bread! Remember, every loaf is a journey—embrace the process and enjoy the sweet rewards.


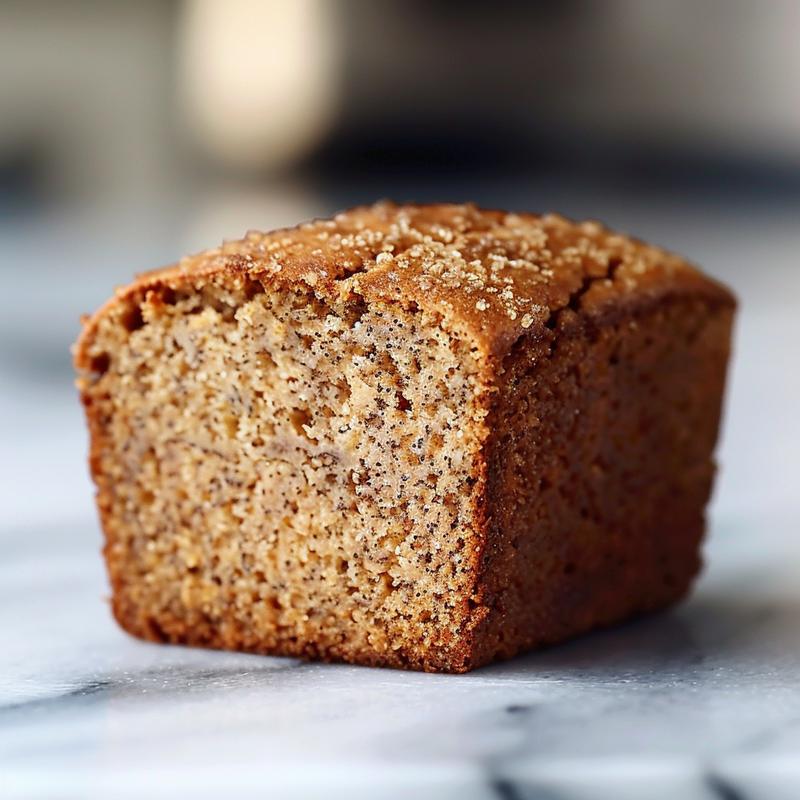
Healthy Gluten-Free Banana Bread
Ingredients
Method
- Preheat oven to 350°F (175°C) and grease a loaf pan.
- Mix mashed bananas, eggs, honey, melted coconut oil, and vanilla until combined.
- Whisk together gluten-free flour, baking soda, salt, and cinnamon.
- Gradually add dry ingredients to wet, stirring until just combined. Fold in nuts or chips if desired.
- Pour batter into pan, smooth top, and bake for 50-60 minutes. Cool before slicing.
Notes
Loved this recipe? Save it to your favorite Pinterest board so you can easily find it later! ✨