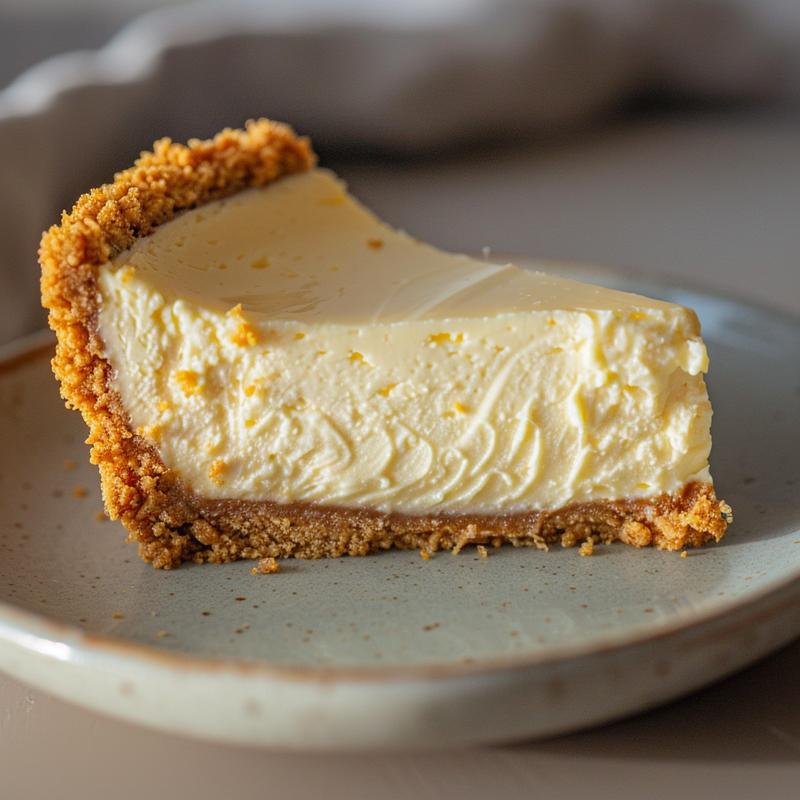
Welcome, dear friends, to Clara’s Kitchen, where we’re about to embark on a delightful journey into the world of gluten-free desserts. Today, we’re recreating a classic—a dessert that whispers of summer picnics and sweet celebrations: Gluten Free No Bake Cheesecake Cups. These aren’t just any cheesecake cups; they’re individual servings of pure, creamy bliss, perfect for those with dietary restrictions or anyone looking for a lighter, no-bake treat. As your guide, I’ll ensure this recipe feels like a warm hug, just like Grandma used to make. 👵🏻🍪
Why You’ll Love This Recipe
Oh, my dears, there are so many reasons to fall in love with these little cups of joy! Imagine a dessert that requires no oven, minimal effort, and delivers maximum flavor. Here’s why you’ll be making these again and again:
- Ease of Preparation: No baking required! Just mix, chill, and enjoy. It’s the perfect dessert for warm days when you don’t want to heat up the kitchen.
- Gluten-Free Goodness: These are crafted with gluten-free graham cracker crumbs, making them a safe and delicious option for those with gluten sensitivities.
- Individual Portions: Perfect for parties, gatherings, or when you simply want a single serving of cheesecake without the guilt. These cheesecake cups individual are always a hit!
- Customizable: The toppings are entirely up to you! Fresh berries, chocolate shavings, whipped cream—the possibilities are endless.
- Make-Ahead Friendly: These can be made a day or two in advance, making them ideal for busy schedules.
- Crowd-Pleaser: These mini gluten free desserts are always a hit, especially for parties or special occasions.
Ingredients You’ll Need
Let’s gather our ingredients. Each one plays a crucial role in creating the perfect creamy texture and delightful flavor. Remember, quality ingredients make all the difference!
- 1 1/2 cups gluten-free graham cracker crumbs: The foundation of our delightful crust. Ensure they are finely ground for the best texture.
- 6 tablespoons melted unsalted butter: This binds the crumbs together, creating a rich and buttery base.
- 1/4 cup granulated sugar: Adds a touch of sweetness to the crust, complementing the creamy filling.
- 2 (8 ounce) packages cream cheese, softened: The heart of our cheesecake. Make sure it’s fully softened to avoid lumps in the filling. The cream cheese must be soft!
- 1 (14 ounce) can sweetened condensed milk: Adds sweetness and contributes to the creamy texture of the filling.
- 1/3 cup lemon juice: A touch of acidity that brightens the flavor and helps the cheesecake set.
- 1 teaspoon vanilla extract: Enhances the overall flavor profile, adding a hint of warmth and complexity.
- Optional toppings: fresh berries, chocolate shavings, whipped cream—let your imagination run wild!
Step-by-Step Instructions
Now, let’s get to the fun part: creating our Gluten Free No Bake Cheesecake Cups. Follow these simple steps, and you’ll have a batch of delightful desserts in no time.
- Prepare the Crust: In a medium bowl, combine gluten-free graham cracker crumbs, melted butter, and sugar. Mix well until the crumbs are evenly moistened.
- Assemble the Cups: Press the crumb mixture firmly into the bottom of 12 cupcake liners in a muffin tin. You can also use small glasses or jars if you prefer a more rustic look.
- Make the Filling: In a large bowl, beat the softened cream cheese with an electric mixer until smooth and creamy. This is crucial for a lump-free filling.
- Combine Ingredients: Gradually add the sweetened condensed milk and mix until well combined. Be sure to scrape down the sides of the bowl to ensure everything is incorporated.
- Add Flavor: Stir in the lemon juice and vanilla extract until smooth. The lemon juice will help the cheesecake set properly.
- Fill the Cups: Spoon the cheesecake filling evenly into the prepared cupcake liners or glasses.
- Chill: Cover and refrigerate for at least 4 hours, or preferably overnight, to allow the cheesecake to set completely.
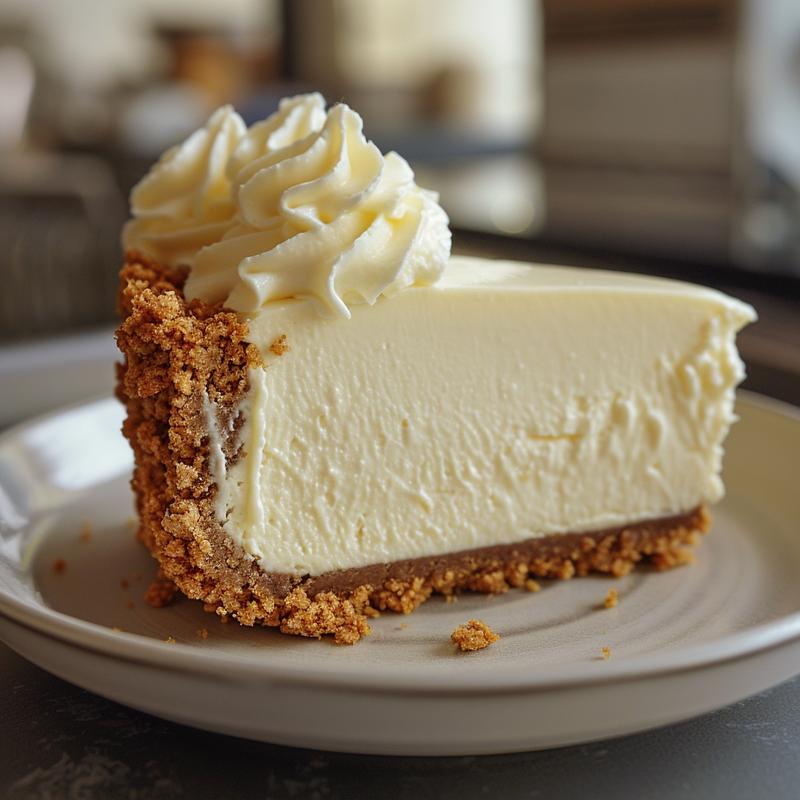
- Garnish and Serve: Before serving, top with your favorite toppings such as fresh berries, chocolate shavings, or whipped cream.
Pro Tips for Perfect Cheesecake Cups
Here are a few extra tips to ensure your Gluten Free No Bake Cheesecake Cups turn out perfectly every time:
- Softened Cream Cheese is Key: Ensure your cream cheese is fully softened at room temperature before mixing. This will prevent lumps and create a smooth, creamy filling.
- Don’t Overmix: Overmixing can incorporate too much air into the filling, which can cause it to deflate slightly as it sets. Mix just until combined.
- Chill Thoroughly: Allow the cheesecake cups to chill for at least 4 hours, or preferably overnight. This is essential for the cheesecake to set properly.
- Use Quality Ingredients: Opt for high-quality cream cheese and gluten-free graham crackers for the best flavor and texture.
- Even Distribution: When pressing the crust into the cupcake liners, use the bottom of a measuring cup to ensure an even and firm crust.
- Taste Test: Before filling the cups, give the filling a taste and adjust the sweetness or lemon juice to your liking.
- Creative Toppings: Don’t be afraid to experiment with toppings! From fresh fruit to chocolate ganache, the possibilities are endless.
Common Mistakes to Avoid
Even the most experienced bakers can sometimes make mistakes. Here are a few common pitfalls to avoid when making these cheesecake cups:
- Using Cold Cream Cheese: Cold cream cheese will result in a lumpy filling. Ensure it’s fully softened.
- Overmixing the Filling: Overmixing can cause the filling to become too thin. Mix just until combined.
- Not Chilling Long Enough: Insufficient chilling time will result in a soft, unset cheesecake. Allow at least 4 hours, or preferably overnight.
- Skipping the Lemon Juice: The lemon juice not only adds flavor but also helps the cheesecake set properly.
- Using Old Graham Cracker Crumbs: Old crumbs can taste stale. Use fresh gluten-free graham cracker crumbs for the best flavor.
- Ignoring Measurements: Baking is a science. Accurate measurements are crucial for the best results.
Variations to Try
One of the best things about this recipe is its versatility. Here are a few variations to try and make it your own:
- Chocolate Cheesecake Cups: Add 1/4 cup of cocoa powder to the filling for a rich chocolate flavor. You can also use dark chocolate shavings as a topping.
- Berry Swirl Cheesecake Cups: Swirl in your favorite berry jam or puree into the filling before chilling.
- Lemon Cheesecake Cups: Add a teaspoon of lemon zest to the filling for an extra burst of citrus flavor.
- Peanut Butter Cheesecake Cups: Swirl in a tablespoon of peanut butter into the filling for a nutty twist.
- Oreo Cheesecake Cups: Crush gluten-free Oreo cookies and mix them into the filling for a cookies and cream flavor.
- Dairy Free Option: For those who are dairy free, you can substitute the cream cheese with a dairy-free cream cheese alternative and ensure your graham crackers are also dairy free.
How to Store
These Gluten Free No Bake Cheesecake Cups are best stored in the refrigerator. Cover them tightly with plastic wrap or store them in an airtight container to prevent them from drying out. They will keep well for up to 3-4 days.
Frequently Asked Questions (FAQ)
- Can I use regular graham crackers if I don’t need them to be gluten-free?: Of course! If gluten isn’t a concern, feel free to use regular graham crackers for the crust.
- Can I freeze these cheesecake cups?: Yes, you can freeze them for up to 2 months. Wrap them individually in plastic wrap and then place them in a freezer-safe bag. Thaw in the refrigerator before serving.
- Can I make these without the graham cracker crust?: Absolutely! If you prefer, you can skip the crust and simply fill the cupcake liners with the cheesecake filling.
- Can I use a different type of sweetener?: Yes, you can substitute the granulated sugar with powdered sugar or another sweetener of your choice. Adjust the amount to your liking.
- Can I make these in advance?: Yes, these are perfect for making ahead. They can be made a day or two in advance and stored in the refrigerator until ready to serve.
- Can I add other flavors to the filling?: Of course! Feel free to experiment with different extracts, such as almond or peppermint, to customize the flavor.
- Can I make a large cheesecake instead of individual cups?: Yes, you can press the graham cracker crust into the bottom of a springform pan and pour the filling over it. Chill for at least 6 hours, or preferably overnight.
- Can I use almond flour instead of graham cracker crumbs?: While not traditional, you can use almond flour if you are looking for a nuttier flavor and a grain-free option. Mix it with melted butter and a touch of sweetener as you would with the graham cracker crumbs.
Serving Suggestions
These Gluten Free No Bake Cheesecake Cups are incredibly versatile and can be served in a variety of ways. Here are a few ideas:
- Elegant Dessert: Serve them on a pretty platter with fresh berries and a dusting of powdered sugar for an elegant dessert.
- Casual Treat: Enjoy them straight from the refrigerator as a quick and easy treat.
- Party Favor: Package them in individual containers and give them out as party favors.
- Picnic Perfect: Pack them in a cooler for a delightful picnic dessert.
- Holiday Dessert: Customize the toppings to match the holiday theme. For example, top with cranberries and a sprig of rosemary for Christmas.
- With Coffee or Tea: These cheesecake cups pair perfectly with a cup of coffee or tea for a relaxing afternoon treat.
And there you have it, my dears! Gluten Free No Bake Cheesecake Cups that are easy to make, delicious to eat, and perfect for any occasion. I hope this recipe brings as much joy to your kitchen as it does to mine. Happy baking! Remember, it is all about the cream cheese!

Gluten Free No Bake Cheesecake Cups- Easy & Creamy
Ingredients
Method
- Combine graham cracker crumbs, melted butter, and sugar.
- Press into cupcake liners in a muffin tin.
- Beat cream cheese until smooth.
- Add sweetened condensed milk and mix.
- Stir in lemon juice and vanilla.
- Spoon filling into liners.
- Refrigerate for at least 4 hours.
- Top with your favorite toppings before serving.
Notes
Loved this recipe? Save it to your favorite Pinterest board so you can easily find it later! ✨